Run RadioBOSS on your computer.
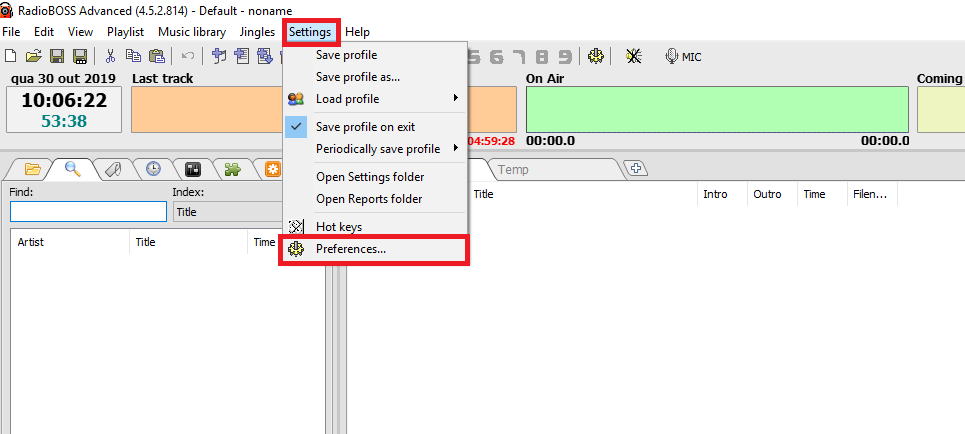
After running it, click the “Settings” option, and then “Preferences” as shown in the image below:

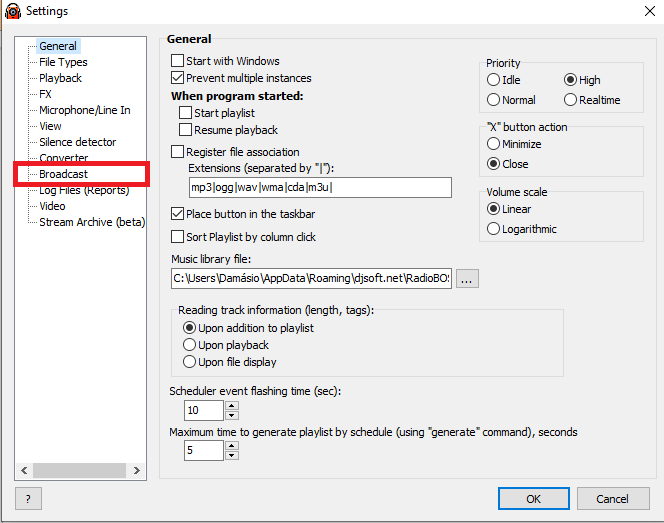
Select the “Broadcast” menu in the left corner:

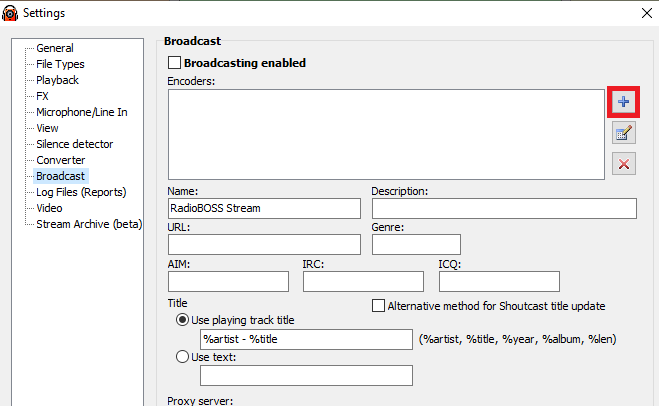
Click the “+” option to add a new encoder:

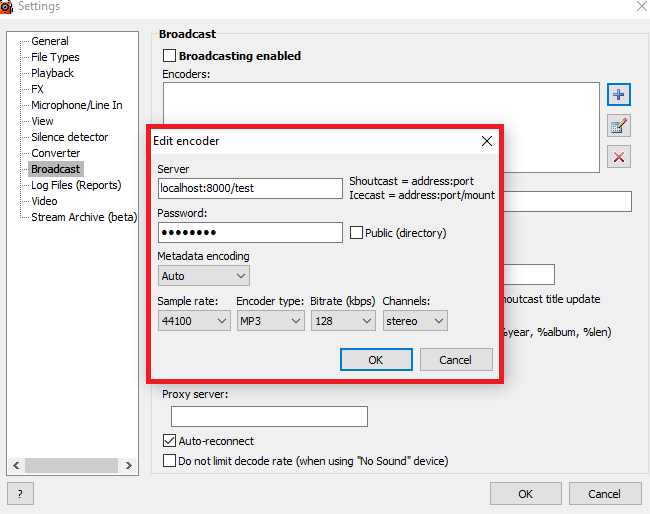
A new screen will be displayed where your web radio data should be added:

Fill in with the data that is available in the management panel of your radio, according to the information below:
– Server: Enter your BRLOGIC streaming address and port. Example: serverxx.brlogic.com:xxxx;
– Password: Enter your broadcast password;
– Metadata encoding: Select the “ANSI” option;
– Encoder type: For AAC broadcasts, select “AAC +”; For MP3 broadcasts, select “MP3”;
– Bitrate (kbps): Enter the quality of your web radio;
– Channels: Mono or Stereo;
RadioBoss is compatible with IceCast and ShoutCast technologies. Although the BRLOGIC platform uses IceCast technology on its servers, there is also compatibility for ShoutCast broadcasts.
After filling in the fields with the information above, click “Ok“.
Select the boxes marked in red in the image below:

The information to be added is optional.
Fill in the fields as follows:
– Name: Enter the name of your web radio;
– Description: Enter the description of your radio web;
– URL: Enter the website address of your web radio;
– Genre: Enter the genre of your web radio;
After entering the data, click “Ok“, close RadioBOSS to save your settings then reinitiate it.
Done!
Your web radio is ONLINE through RadioBOSS, and is broadcasting to all your listeners!
Do you have any question?
If you are one of our customers, please, click here to open a support request. We will assist you as you needed.
Not a customer yet?
Click here to start your radio station right now!
You can try our services without any cost and with no commitment!